


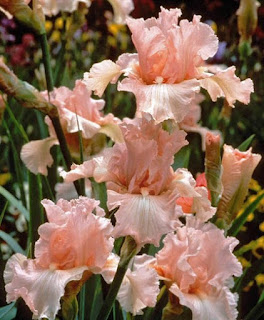
This is my favorite flower, among other favorites. Of all the unique, unusual flowers iris stand above the rest with their bold, showy petals. Of course, there is no bias here. Irises can create a mass of color that is striking, but don’t blink. That color disappears quickly. However, they are memorable.
The best part is that they come in all colors. No matter what the color palette of your landscape there is always room for an iris to match or compliment. From white to every color of the rainbow and then dark, rich colors such as purple and black.
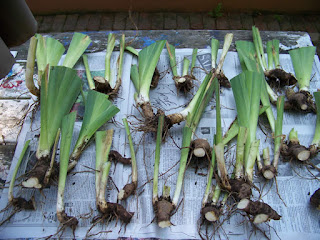
Iris are easy maintenance. Their rhizomes love to bake in the heat of the summer. After the first frost in the fall, their leaves need to be cut back. In late spring or early summer after they bloom, if they have lost their vitality or are not as prolific, it is time to divide the iris. Dig up the rhizomes using a digging fork, anytime from July through September. The heat and dry soil in summer is perfect for discouraging soft rot on the rhizomes. Separate the old clumps of rhizomes by using a sharp knife. Dip the knife in 10 percent bleach solution between dividing clumps. It is best to save the strong outside pieces of a clump. Cut the rhizomes into pieces with each having a single fan of leaves.
Also cut the leaves down to a third of the original length. Then plant the divisions with the rhizomes barely covered. Plant them so that the fans are facing in one direction. For those of you who are visual learners here is a short series of instructions, illustrated through photos.
Here is a picture step-by-step instructions for dividing iris from University of Maryland Extension:
- Dig irises by using a spading fork
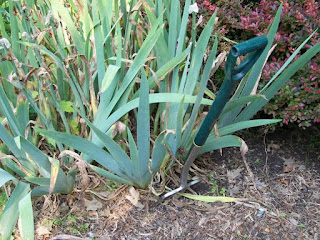
2. Remove the soil and check for root rot or borers.
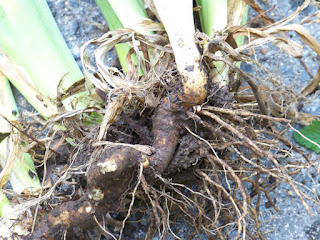
3. Discard old or rotten rhizomes. Cut the rhizomes to a few inches.
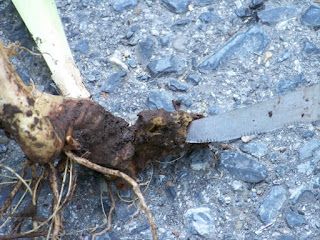
4. Let the newly cut rhizomes stay in the sun for a day or two. During this a suberization process occurs meaning – to make impermeable by the formation of suberin in the cell walls, changing them into cork. The cells suberize.
Below is an iris now blooming at my house:
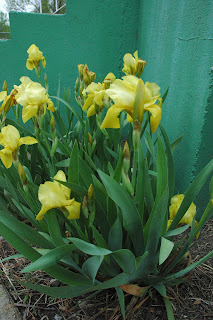
I moved into a new home last year and a friend had asked if I wanted some iris. I had flower beds but they were completely empty. He said that they were yellow and that is all that he knew about them. A mystery iris. These iris flower early and are shorter than most. They are perfect for the backdrop of the foundation which is painted green. I think I have them properly identified as Scholar. Scholar gets to be 13 inches and is a standard dwarf bearded iris. It was developed in 2000 and does not rebloom later in the season. It flowers early meaning early May to mid-May and will continue for another week depending on the weather. I identified my mystery iris. Do you have a mystery iris in your garden?