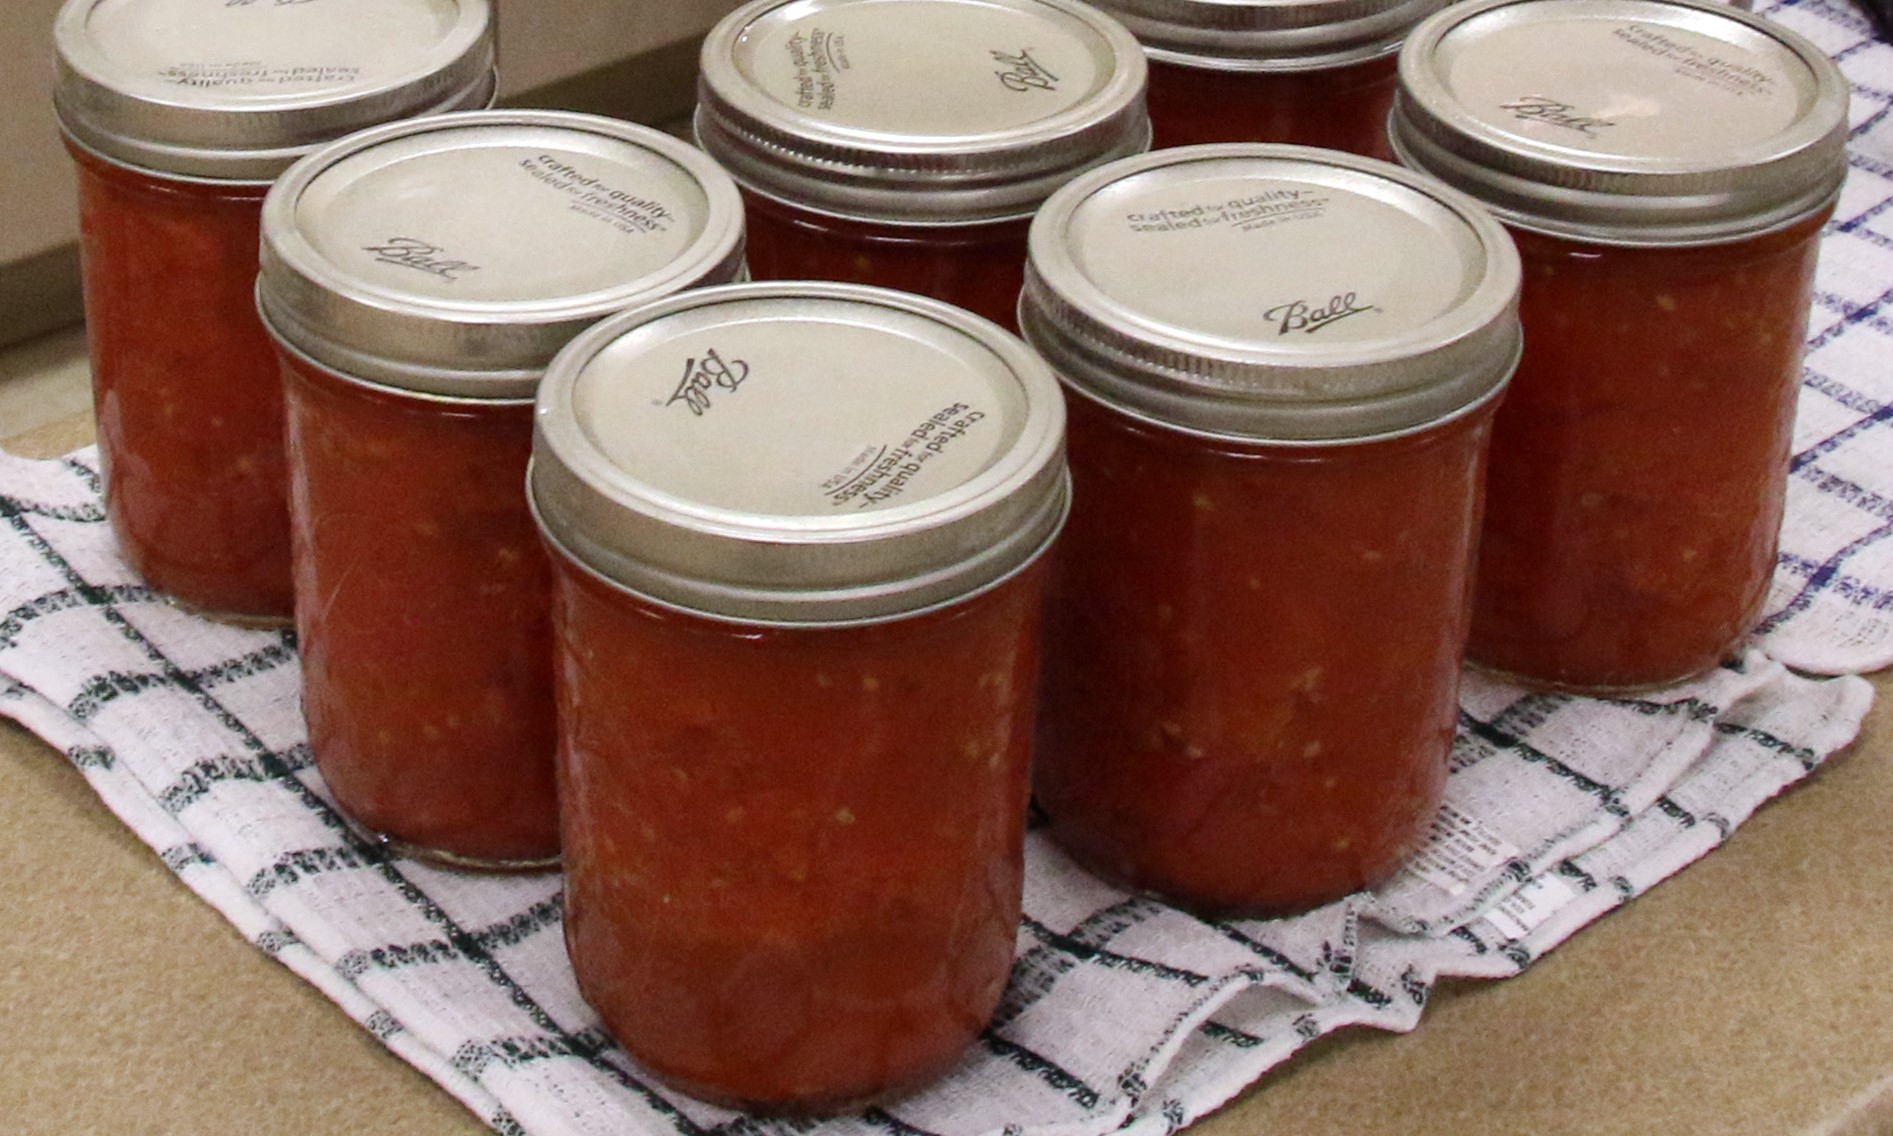
A Guide to Canning Tomatoes and Tomato Products
By M. Bunning, P. Kendall, and E. Shackelton* (6/23)
Quick Facts
- Select fresh, undamaged, vine-ripened tomatoes for canning. Avoid overripe tomatoes.
- To ensure safety, acid must be added when canning whole, crushed, or juiced tomatoes.
- Freezing is a safe, easy alternative to home canning. Frozen tomatoes and tomato products do not need added acid.
- Use CSU Extension’s free Preserve Smart app/website for 24/7 access to tested home food preservation recipes with step-bystep instructions for over 55 fruits and vegetables!
Home canning is a popular way to preserve tomatoes for later use. Using tested methods and recipes, choice ingredients, and having an awareness of acidity requirements are critical to a safe home-canned product.
- Note: The canning recipes and procedures recommended in this fact sheet are the result of USDA research on safe home-canning for tomatoes and tomato products.
Understanding Tomato Acidity
Although tomatoes are traditionally considered a high-acid food (pH below 4.6), certain conditions and varieties can yield tomatoes and tomato products with pH values above 4.6.
Several conditions can reduce the acidity of tomatoes:
- Tomatoes with decay or damage caused by bruises, cracks, blossom end rot, or insects.
- Tomatoes grown in the shade, ripened in shorter hours of daylight, ripened off the vine (compared to those ripened in direct sunlight on the vine), or over-ripened.
- Tomatoes attached to dead vines at harvest (compared to tomatoes harvested from healthy vines).
- Decayed and damaged tomatoes and those harvested from frost-killed or dead vines should not be home canned.
Because of the uncertainty related to the pH of tomatoes, ALL home-preserved tomato products must be acidified to a pH of 4.6 or below (using lemon juice, citric acid, or vinegar (5% acidity)) and processed as a low-acid food using a boiling water or pressure canner.
- The processing times stated in the recipes in this fact sheet are designed to ensure destruction of microorganisms. Where appropriate, processing recommendations for both boiling water canners and pressure canners are given. However, using a pressure canner generally results in higher quality canned tomato products
Acidifying Home-Canned Tomatoes and Tomato Products
To ensure safe acidity in whole, crushed or juiced tomatoes, add lemon juice, citric acid, or vinegar prior to processing:
- Acid should be added directly to the jars before filling with product.
- For quarts: add 2 tablespoons of bottled lemon juice, 1/2 teaspoon of citric acid, or 4 tablespoons vinegar.*
For pints: add 1 tablespoon bottled lemon juice, 1/4 teaspoon citric acid, or 2 tablespoons vinegar.*
*Note: Recipes list lemon juice or citric acid but vinegar in listed amounts may be used instead. Sugar may be added to offset the sour flavor (up to 1 teaspoon per pint or 2 teaspoons per quart).
Process Carefully to Avoid Spoilage
The most common reasons for spoilage in home-canned tomato products are under-processing and failed seals. Tomatoes that have not been processed long enough to destroy heat-resistant bacteria and fungi (molds) may spoil during storage
- Never use canned tomatoes or tomato juices with off-odors!
IMPORTANT: Following the directions and processing times stated in this fact sheet will ensure sufficient destruction of bacteria and fungi.
Preparing Jars and Equipment
Canning Jars
- Use standard mason jars designed specifically for home canning.
- Discard any jars with cracks or chips since defects can prevent an airtight seal or failure during the canning process.
- Wash jars in hot, soapy water and rinse well before using.
Do not use commercial food jars (mayonnaise, pasta sauce, etc.) as they are not heat-tempered and can break easily and/or not seal properly when processed.
Lids and Screw Bands (two-piece set)
- Prepare new/unused flat metal lids as directed by the manufacturer.
- Lids are designed for single-use, and should NOT be used for home canning more than once!
- Discard any screw bands with dents or rust, since defects can prevent an airtight seal.
- Screw bands can be cleaned and used multiple times. Store carefully to prevent rusting or denting.
NOTE: One-piece home canning lids have not been researched for safe home food preservation, and are therefore not recommended.
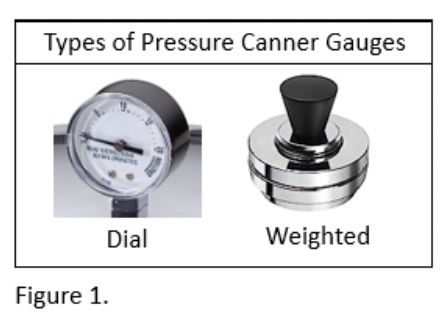
Pressure canner
A pressure canner is a specially-made heavy pot with a tight-fitting lid designed to prevent steam from escaping. The lid is fitted with a vent (or petcock), a pressure gauge, and a safety valve. NOTE: ONLY use a pressure canner tested and designed for home canning. Electric multi-cookers are not recommended.
There are two types of pressure gauges (Figure 1.):
- Weighted gauges (gently rocks under pressure)
- Dial gauges need to be checked periodically for accuracy. Check each season before use, and more frequently, if used often.
- Contact your nearest Extension county office to have your dial gauge and lid checked for safety
Before using a pressure canner, clean well and be sure the exhaust vent, safety valve and the edges of the lid and/or gasket are clean, and the dial gauge (if using) has been tested for accuracy.
Boiling water canner
A boiling water canner is a large covered cooking pot with a rack that allows water to circulate under the jars, as well as helps prevent jars from touching each other or falling against the side of the canner.
- Any large metal pan may be used as a boiling water canner if it is deep enough, has a tight-fitting cover, and has a rack that can elevate the jars off the bottom of the canner.
- Be sure the container is at least 4 to 5 inches deeper than the height of jars used to allow adequate space for the rack and briskly boiling water.
- For pint jars, you need a container at least 10 inches deep.
- For quart jars, the container should be at least 12 inches deep.
- Be sure the container is at least 4 to 5 inches deeper than the height of jars used to allow adequate space for the rack and briskly boiling water.
- A deep pressure canner can also be used as a boiling water canner.
- Cover but do not fasten the lid.
- Leave the petcock wide open so steam can escape and pressure does not build up inside the canner.
Other Useful Canning Tools
- Air bubble remover, plastic knife, or non-metallic spatula- used to release air bubbles from within the jar.
- Canning funnel- a funnel made from metal or food-grade plastic with wide, short neck for filling jars.
- Headspace ruler- a special graduated utensil or plastic ruler for measuring required space at the top of a filled jar.
- Jar lifter- used to safely move jars to and from hot water during the canning process Magnetic lid wand- helps transfer metal lids to top of jars and prevent contamination.
- Timer- necessary for critical timed steps throughout the canning process
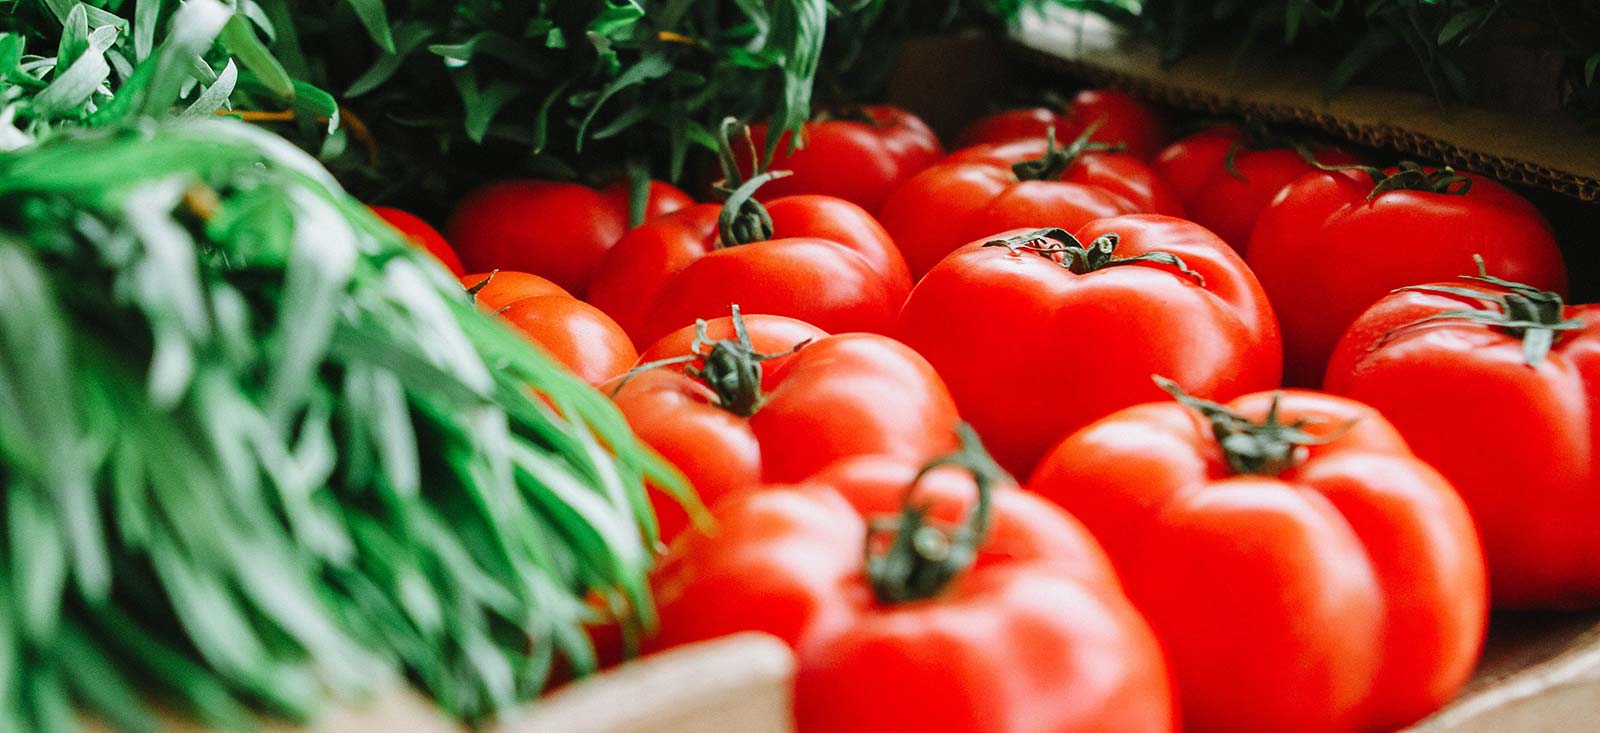
Preparing Tomatoes
Select fresh, firm, ripe tomatoes.
- Approximately 2 1/2 to 3 1/2 pounds of fresh tomatoes makes 1 quart of canned tomatoes.
- Green tomatoes are more acidic than ripened tomatoes and can be canned safely using directions for ripened tomatoes.
- Do not can soft, over-ripe, moldy or decayed tomatoes or tomatoes harvested from dead or frost-killed vines.
Wash, peel, and trim tomatoes.
- Rinse tomatoes under running water to clean.
- To remove skins, dip in boiling water for 30 to 60 seconds or until the skins split. Transfer to container containing ice cold water.
- Use a sharp knife to peel off the skin, cut out the core, and trim away any bruised or discolored portions.
Pre-heat the Canner
Add water to the canner and bring to a boil:
- 2-3″ of water in a pressure canner.
- Enough to have 1-2″ of water above the top of the filled jars in a boiling water canner*
*NOTE: It can be difficult to determine how much water you will need before the filled jars are placed in the canner. Be prepared by having an extra pan of water heating in case you’ve heated too little water in your canner. Remove excess water, if necessary.
Filling Jars and Processing
Fill jars according to the processing method described for each product on the following pages.
- Acidify by adding lemon juice, citric acid, or vinegar (5%) to each jar, or as specified in the recipe.
- Add the prepared product to the jars.
- Remove trapped air bubbles by inserting a nonmetallic spatula or knife between the food and the jar and slowly turning the jar to allow air bubbles to escape.
- Add more liquid if necessary to obtain the proper headspace (see specifications by recipe in Table 1).
- Wipe the jar rim with a clean, damp paper towel to remove any food particles.
- Place lid on the jar. Turn the screw band fingertip tight. Do NOT overtighten which can cause buckling of lids!
- Place filled jar in the pre-heated canner.
- Process jars in a boiling water or pressure canner as described in recipe in Table 1.
Testing Seals
After processing, use a jar lifter to carefully remove jars from canner and place on rack, dry towel or newspaper, leaving at least 1″ space between jars.
- Allow jars to cool untouched, away from drafts, for 12 to 24 hours before testing seals.
- To test jar seals, press lids at the center. They should be slightly concave and not move.
- If sealed, remove screw bands. Label sealed jars with contents, canning method and date. Store in a clean, cool, dry, dark place.
- If not sealed, the product must be reprocessed, refrigerated, or frozen immediately.
Reprocessing
VERY IMPORTANT: Treat any jars that failed to seal as perishable (not shelf-stable).
- The food should either be eaten immediately, refrigerated, frozen, or reprocessed.
- The food can be safely reprocessed within 24 hours after the first processing.
- You must repeat the entire canning process, using a new lid to ensure a safe product.
- To reprocess, remove lids and empty the contents into a pan. Cover and heat to boiling. Pack into clean, hot jars. Put on new pre-treated lids. Process again for the full time specified in recipe.
If you notice unsealed jars more than 24 hours after processing, do not reprocess jars. Discard the contents!
| Table 1: Directions for Canning Tomatoes and Tomato Products in a Boiling Water Canner or Pressure Canner | ||||||
| General directions: Wash, peel, and trim tomatoes as described in the ‘Prepare Tomatoes‘ section. Fill and process jars accordingly if the raw or hot pack method is provided. Release air bubbles and close jars as described in the ‘Fill Jars and Process‘ section. Process in a boiling water canner or pressure canner as directed in each recipe and for your elevation. Important: Wait to begin timing until the water returns to boiling or the canner gauge reaches the specified pressure!
*Pressure canner: Dial gauge: 11 lb @ 0-2,000 ft.; 12 lb @ 2001-4000 ft.; 13 lb @ 4,001-6000 ft.; 14 lb @ 6,001-8,000 ft.; 15 lb @ 8,001-10,000 ft. elevation. Weighted gauge: 15 lb @ 1,000-10,000 ft. elevation. | ||||||
| Processing Time (in minutes) | ||||||
|---|---|---|---|---|---|---|
| Boiling water canner at elevations of: | ||||||
| Product and Procedure | Jar size | 1,001 -3,000 ft. | 3,001 -6,000 ft. | 6,001 -8,000 ft. | 8,001 -10,000 ft. | Pressure canner*
0-10,000 ft. |
| Tomato Juice | pints | 40 min. | 45 min. | 50 min. | 55 min. | 15 min. |
| quarts | 45 min. | 50 min. | 55 min. | 60 min. | 15 min. | |
| Wash, peel, and trim tomatoes. To prevent juice from separating, quickly quarter 1 pound of tomatoes into a large saucepan. Heat immediately to boiling while crushing. Continue to slowly add freshly cut tomato quarters to the boiling mixture and crush. Simmer 5 minutes after all pieces are added. Press juice through a food mill or sieve to remove skins and seeds. Add 2 tablespoons bottled lemon juice or 1/2 teaspoon citric acid to quart jars. Use half this amount for pints. Add 1 teaspoon salt per quart (1/2 teaspoon per pint) to jars, if desired. Heat juice again to boiling. Fill jars with hot juice, leaving 1/2-inch headspace. Close jars and process. | ||||||
| Tomato and Vegetable Juice Blend | pints | 40 min. | 45 min. | 50 min. | 55 min. | 15 min. |
| quarts | 45 min. | 50 min. | 55 min. | 60 min. | 15 min. | |
| Wash, peel, trim, crush and simmer tomatoes as for making tomato juice (above). Add no more than 3 cups of any combination of finely chopped celery, onions, carrots and peppers for each 22 pounds of tomatoes used. Simmer mixture 20 minutes. Press mixture through a foodmill or sieve and continue as described above, also adding lemon juice or citric acid. | ||||||
| Crushed Tomatoes (with no added liquid) | pints | 40 min. | 45 min. | 50 min. | 55 min. | 15 min. |
| quarts | 50 min. | 55 min. | 60 min. | 65 min. | 15 min. | |
| Wash, peel, trim, and quarter tomatoes. Bring 1/6 of quarters quickly to a boil in a large pot, crushing and stirring to exude the juice. Gradually add remaining quarters, stirring constantly. Boil gently 5 minutes. Add 2 tablespoons bottled lemon juice or 1/2 teaspoon citric acid to quart jars. Use half this amount for pints. Add 1 teaspoon salt per quart (1/2 teaspoon per pint) to jars, if desired. Fill jars immediately with hot tomatoes, leaving 1/2-inch headspace. Close jars and process | ||||||
| Standard Tomato Sauce | pints | 40 min. | 45 min. | 50 min. | 55 min. | 15 min. |
| quarts | 45 min. | 50 min. | 55 min. | 60 min. | 15 min. | |
| Wash, peel, trim and press tomatoes as for making tomato juice. Simmer in large kettle until sauce reaches desired consistency (volume is reduced by one-third for thin sauce or by one-half for thick sauce). Add 2 tablespoons bottled lemon juice or 1/2 teaspoon citric acid to quart jars. Use half this amount for pints. Add 1 teaspoon salt per quart (1/2 teaspoon per pint) to jars, if desired. Fill jars with heated sauce, leaving 1/4-inch headspace. Close jars and process. | ||||||
| Whole or Halved Tomatoes (packed in water) | pints | 45 min. | 50 min. | 55 min. | 60 min. | 10 min. |
| quarts | 50 min. | 55 min. | 60 min. | 65 min. | 10 min. | |
| Wash, peel, and trim tomatoes. Leave whole or cut in half. Add 2 tablespoons bottled lemon juice or 1/2 teaspoon citric acid to quart jars. Use half this amount for pints. Add 1 teaspoon salt per quart (1/2 teaspoon per pint) to jars, if desired. Hot Pack – Place tomatoes in large saucepan and add enough water to cover. Boil gently for 5 minutes. Fill jars with hot tomatoes and cooking liquid, leaving 1/2-inch headspace. Close jars and process. Raw Pack – Fill prepared jars with raw tomatoes to 1/2 inch of jar tops. Add hot water, adjusting headspace to 1/2 inch. Close jars and process. Processing time is the same for hot and raw pack. | ||||||
| Whole or Halved Tomatoes (packed in tomato juice or without added liquid) | pints | 90 min. | 95 min. | 100 min. | 105 min. | 25 min. |
| quarts | 90 min. | 95 min. | 100 min. | 105 min. | 25 min. | |
| Wash, peel, and trim tomatoes; leave whole or cut in half. Add 2 tablespoons bottled lemon juice or 1/2 teaspoon citric acid to quart jars. Use half this amount for pints. Add 1 teaspoon salt per quart (1/2 teaspoon per pint) to jars, if desired. Hot Pack — Place tomatoes in large saucepan; add enough tomato juice to cover. Boil gently 5 minutes. Fill jars with hot tomatoes to 1/2 inch of jar tops. Cover tomatoes with hot tomato juice, leaving 1/2-inch headspace. Raw Pack – Fill jars with raw tomatoes to 1/2 inch of jar tops. Cover tomatoes with hot tomato juice or press tomatoes in jars until spaces fill with juice. Leave 1/2-inch headspace. Close jars and process all pack styles for the length of time specified above. | ||||||
| Tomatoes with Zucchini or Okra | pints | Boiling water canner not recommended | 30 min. | |||
| quarts | Boiling water canner not recommended | 35 min. | ||||
| Use up to 1 pound of zucchini or okra for every 3 pounds of tomatoes. Wash, peel, trim, and quarter tomatoes. Wash vegetables and slice or cube. Bring tomatoes to a boil and simmer 10 minutes. Add vegetables and boil gently 5 minutes. Add 1 teaspoon of salt per quart to jars, if desired. Fill jars with mixture. Leave 1-inch headspace. Close jars and process. For variation, add 4 or 5 pearl onions or 2 and 1/4-inch thick onion slices to each jar. | ||||||
| *Pressure canner: Dial gauge: 11 lb @ 0-2,000 ft.; 12 lb @ 2001-4000 ft.; 13 lb @ 4,001-6000 ft.; 14 lb @ 6,001-8,000 ft.; 15 lb @ 8,001-10,000 ft. elevation. Weighted gauge: 15 lb @ 1,000- 10,000 ft. elevation. | ||||||
| General directions: Wash, skin and trim tomatoes as described in the Prepare Tomatoes section. Fill jars according to the raw or hot pack method described for each product. Release air bubbles and fill jars as described in the Fill Jars and Process section. Process in a boiling water bath or pressure canner as directed for your altitude. Begin timing when water returns to boiling or when canner reaches correct pressure. | ||||||
| Processing Time (in minutes) | ||||||
| Boiling water bath at altitudes of: | ||||||
| Product and Procedure | Jar size | 1,001 -3,000 ft. | 3,001 -6,000 ft. | 6,001 -8,000 ft. | 8,001 -10,000 ft. | Pressure canner*
0- 10,000 ft. |
| Spaghetti Sauce (with or without meat) | pints | Boiling water canner not recommended | 60 min. | |||
| quarts | Boiling water canner not recommended | 70 min. | ||||
| With meat –Wash, peel, and trim tomatoes and boil 20 minutes, uncovered, in large saucepan. Put through a food mill or sieve. Saute meat until brown. Add onions, garlic, celery, green peppers and mushrooms (if desired). Cook until vegetables are tender. Combine with tomato pulp in large saucepan. Add salt, oregano, parsley, pepper and brown sugar. Bring to a boil. Simmer, uncovered, until initial volume is reduced by nearly one-half. Stir frequently to avoid burning. Fill jars, leaving 1-inch headspace. Close jars and process for times above. Yields 10 pints. | |||||
| pints | Boiling water canner not recommended | 20 min. | ||||
| quarts | Boiling water canner not recommended | 25 min. | ||||
| Without meat – Follow the above directions, omitting the meat and sauteing the vegetables in 1/4 cup vegetable oil until tender. Yields 9 pints. Caution! Do not increase the portions of onions, peppers or mushrooms. | ||||||
| Mexican Tomato Sauce | pints | Boiling water canner not recommended | 20 min. | |||
| quarts | Boiling water canner not recommended | 25 min. | ||||
| – 2 1/2 to 3 lbs chili peppers, peeled and chopped
– 18 lbs tomatoes, peeled, chopped – 3 cups onions, chopped – 1 tablespoon salt – 1 tablespoon oregano – 1/2 cup vinegar (5% acidity) | Wash and dry chilies. Make a small slit in side of pepper for steam to escape. Place in a hot oven or broiler (400 degrees) for 6-8 minutes, turning frequently until skins blister and crack. Place in a pan and cover with a clean damp cloth for several minutes to cool. Peel off skin starting at stem end and peeling downward. Discard seeds and chop peppers. Wash, peel, trim, and coarsely chop tomatoes. Combine with chopped peppers and remaining ingredients in large saucepan. Bring to a boil, cover and simmer 10 minutes. Fill jars, leaving 1- inch headspace. Close jars and process. Yields about 7 quarts.
Caution! Wear rubber gloves while handling chilies or wash hands thoroughly with soap and water before touching your face | |||||
| Tomato Ketchup | pints and half pints | 20 min. | 20 min. | 25 min. | 25 min. | Pressure canner not recommended |
| – 24 lbs ripe tomatoes, peeled, quartered
– 3 cups onions, chopped – 3/4 teaspoon ground red pepper – 1 1/2 cups sugar – 1 /4 cup salt – 3 tablespoons celery seed – 4 teaspoons whole cloves – 3 sticks cinnamon, crushed – 1 1/2 teaspoons whole allspice – 3 cups cider vinegar (5%) |
| |||||
| Chili Salsa (hot tomato-pepper sauce) | pints and half pints | 20 min. | 20 min. | 25 min. | 25 min. | Pressure canner not recommended |
| – 5 lbs tomatoes, washed, peeled, chopped
– 2 lbs chili peppers, peeled, chopped – 1 lb onions, chopped 1 cup vinegar (5% acidity) – 3 teaspoons salt – 1/2 teaspoon black pepper | Combine prepared tomatoes with peppers, onions, vinegar, salt and pepper in a large saucepan. (See Mexican tomato sauce for information on peeling chili peppers.) Heat to a boil and simmer 10 minutes. Fill jars, leaving 1/2-inch headspace. Close jars and process. Yields 6 to 8 pints. Caution! Wear rubber gloves while handling chili peppers or wash hands thoroughly with soap and water before touching your face. | |||||
| *Pressure canner: Dial gauge: 11 lb @ 0-2,000 ft.; 12 lb @ 2001-4000 ft.; 13 lb @ 4,001-6000 ft.; 14 lb @ 6,001-8,000 ft.; 15 lb @ 8,001-10,000 ft. elevation. Weighted gauge: 15 lb @ 1,000-10,000 ft. elevation. | ||||||
Reference
USDA Complete Guide to Home Canning. Agriculture Information Bulletin No. 539. U.S. Department of Agriculture, National Institute of Food and Agriculture. 2015. (Available at: http://nchfp.uga.edu/publications/publications_usda.html)
Resources
- Preserve Smart app/website
- Freezing Vegetables
- Drying Vegetables
- Food Preservation without Sugar and Salt
Colorado State University, U.S. Department of Agriculture and Colorado counties cooperating. Extension programs are available to all without discrimination. No endorsement of products mentioned is intended nor is criticism implied of products not mentioned.
Go to top of this page.